
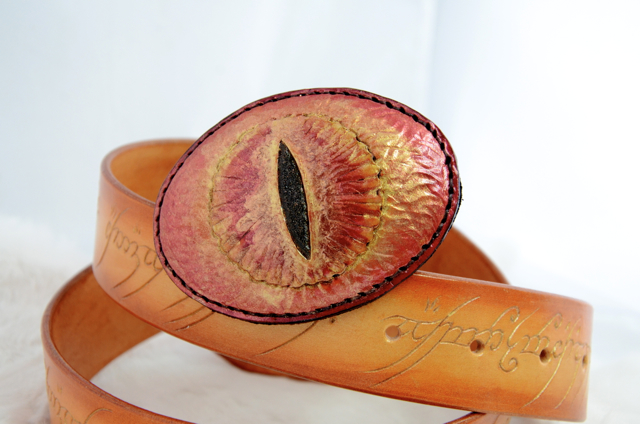
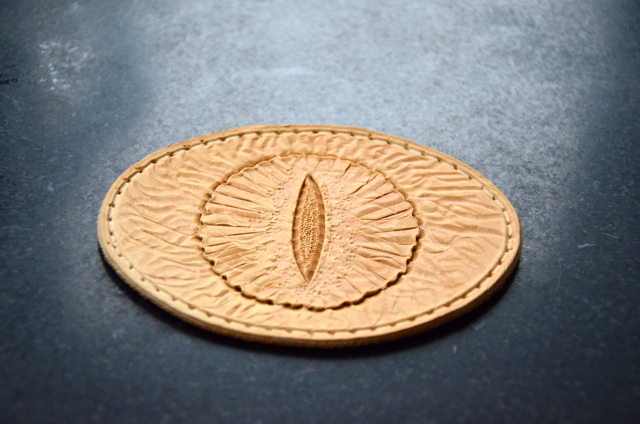
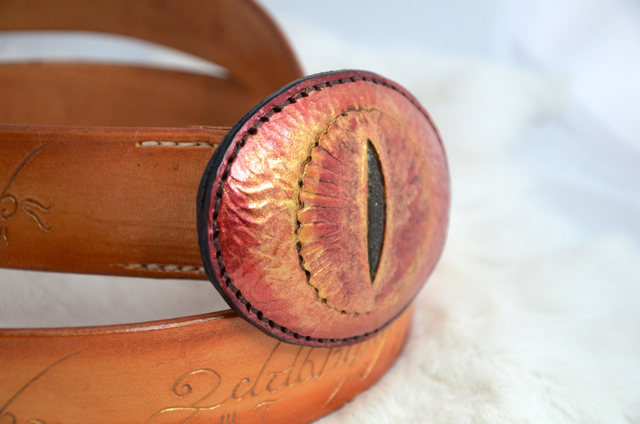
Crafting a leather belt buckle from one of the buckle blanks from Tandy is not hard provided that you have some basic leathercraft supplies and a little know-how. This is the first leather-covered buckle I’ve made, and I’ve photographed the steps to give you a tutorial on how it’s done. The buckle made in the tutorial is the “Eye of Sauron” from the Lord of the Rings. The belt itself has the Elvish (Sindarin) inscription of the ring in the movie. The belt will be a birthday gift to my younger brother who will be visiting us in Quebec over Easter, although his birthday was in February.
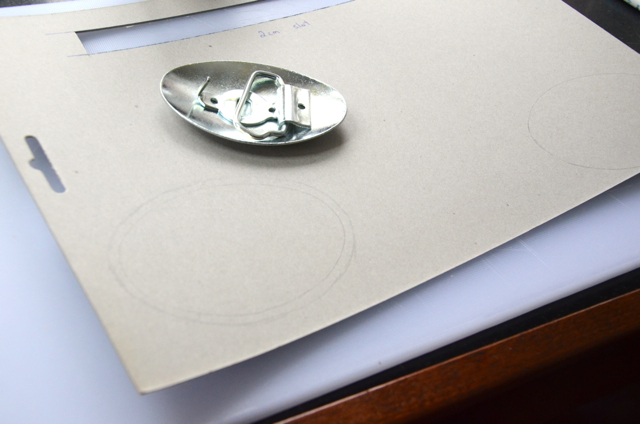
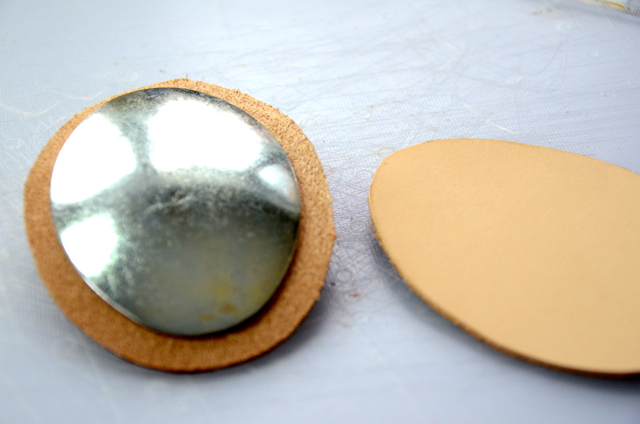
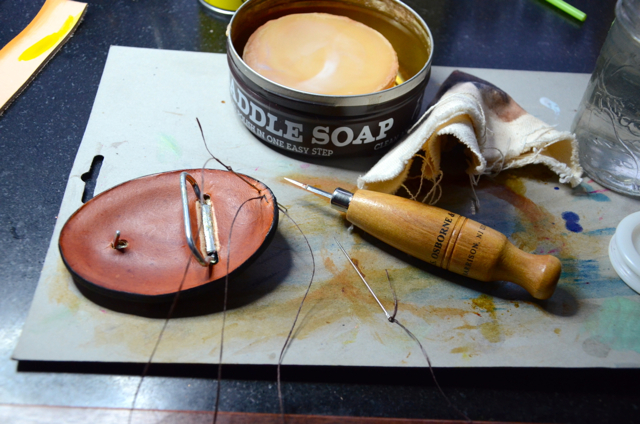
Start by tracing your buckle blank (I used this one from Tandy. Trace the buckle on some cardboard (this will be your template) as accurately as you can. Draw a border 1/4″ around this tracing, and cut it out. You want the extra 1/4″ to allow room for stitching the layers closed around the metal piece.
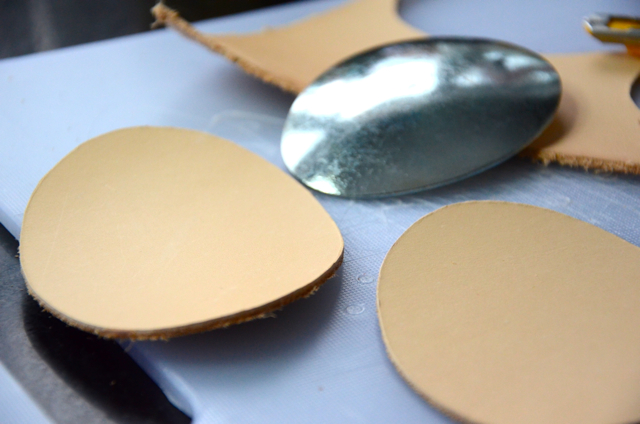
Using your cardboard template, cut two identical pieces of 4-5oz vegetable tanned leather. I cut mine with an Olfa knife. Wet (“case”) your leather, as we are about to do some tooling and molding.
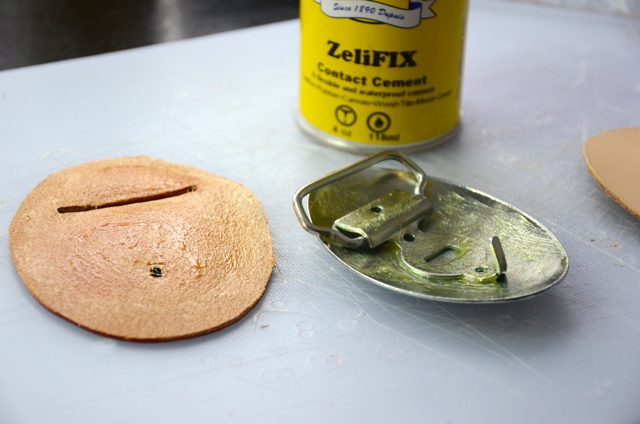
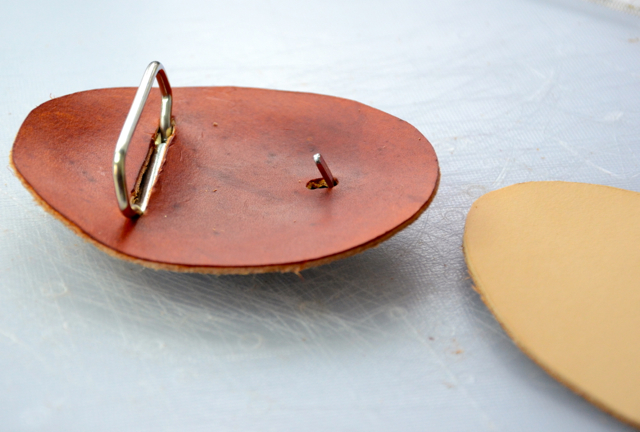
Measure where you need to cut the hole and the slot to fit the back of the buckle, and cut them. I had to enlarge mine to get them to fit onto the blank. Dye it in colour you like (I used Eco Flo Professional Waterstain in Tan). While the leather is still damp (and pliable), brush the flesh side and the back of the buckle with a thin layer of leather cement and allow it to dry until it becomes tacky (a minute or two). If you don’t wait, it will slide around so much that you have to hold it in place to get it to set where you want it to. Center it on the back of the belt buckle and use your fingers to press the leather to the contours of the metal. The glue will hold it down. Assure that the leather is centered on the buckle so you have enough room to stitch (or lace) around the edges to attach it to the front piece of leather.
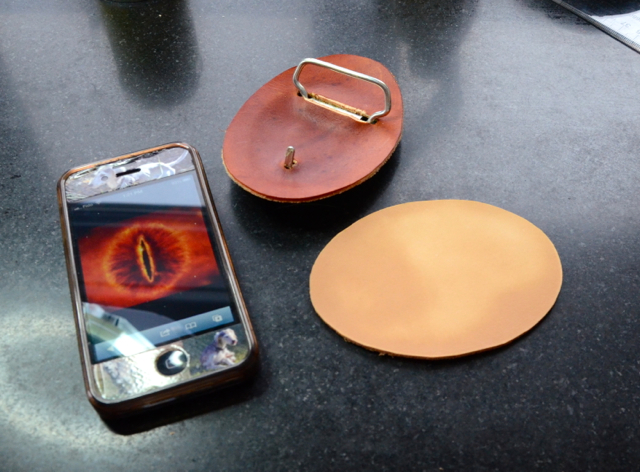
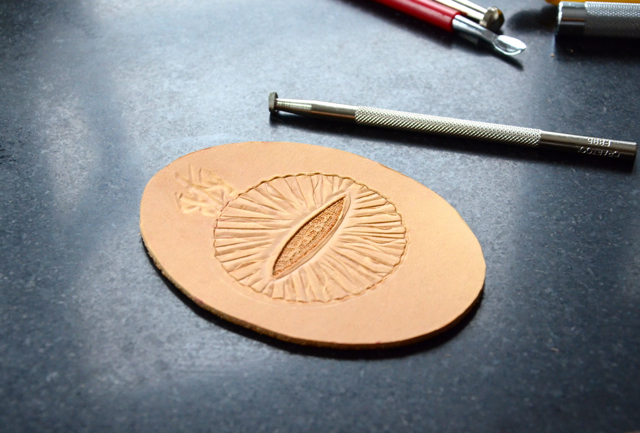
Decide how you want to tool your belt buckle. This one will have the Eye of Sauron tooled and dyed onto it. The leather is thin, so I can’t achieve much depth to the tooling, but I still want it to have a nice texture. I pulled up a google image on my iphone for reference. I didn’t plan the tooling order; I just used whatever was on hand. The tools I used were; a Swivel knife, a Barry King bargrounder for the pupil, I dragged a figure beveler in waves for the flames, and an unnamed (from Ebay) texture stamp (shaped a bit like a starburst) on the iris on the pupil. I also enhanced the iris edges with a Barry King petal lifter. It will look less like one of my grandmothers’ doilies after it’s dyed! If you’re going to sew around the buckle, groove it now and use your stitching wheel around the outside. I antiqued it with Fiebings antique paste in saddle tan, although this step wasn’t really necessary with the extent of the dying on this project.
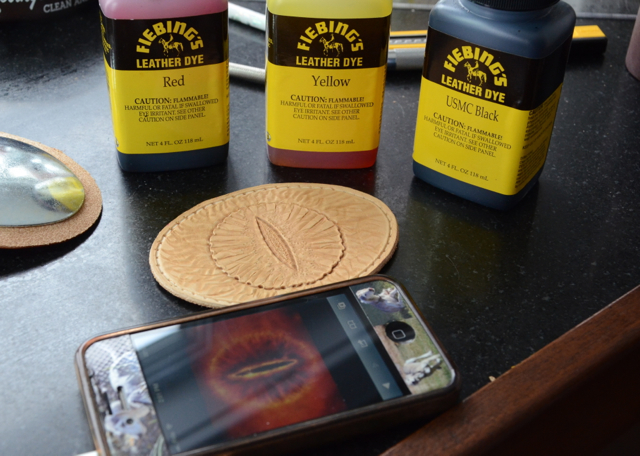
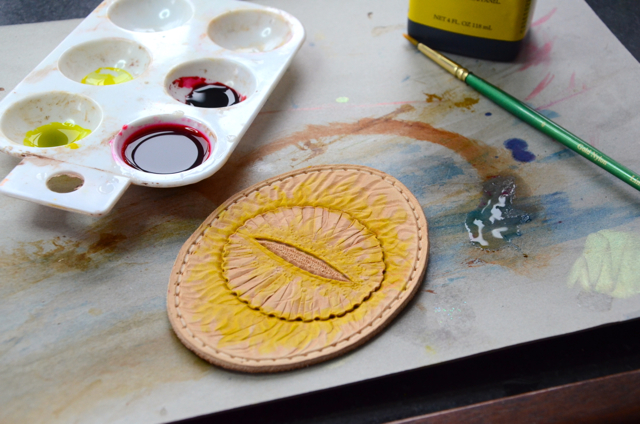
I’ve found the most vibrant of leather dyes to be spirit (alcohol) based, and I’ve used the Fiebings brand for this. The dyes can be thinned with rubbing alcohol so you can layer the colours as you would like. I dye it a bit lighter than it needs to be, because the leather underneath will darken significantly as it’s exposed to light over time.
Before the leather is dry, brush a layer of glue on both the front of the metal buckle blank and on the flesh side of the piece you’ve just dyed. When it’s tacky, place it on the buckle and align to the back piece you glued on earlier. I used a series of clips to hold it.
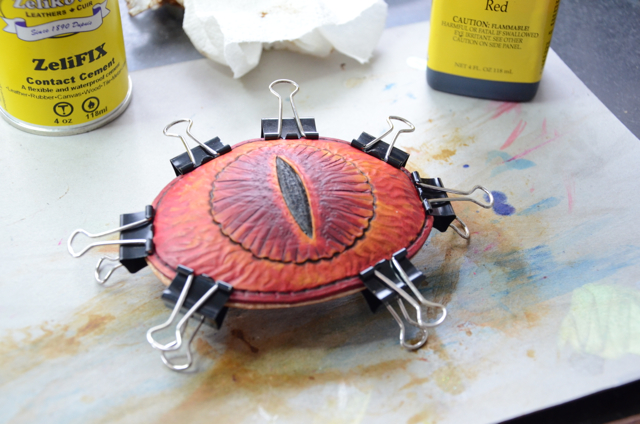
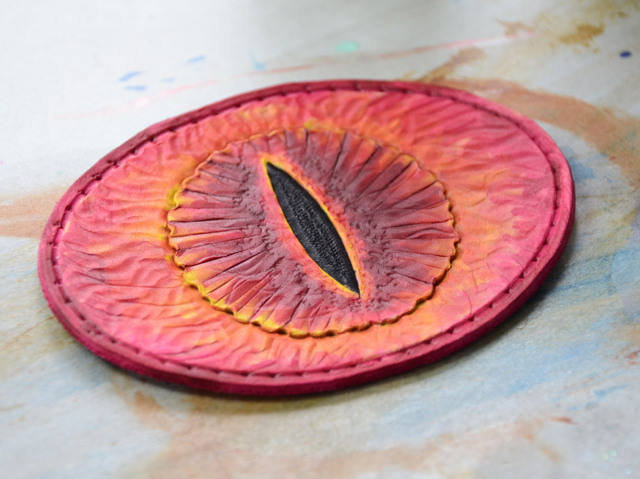
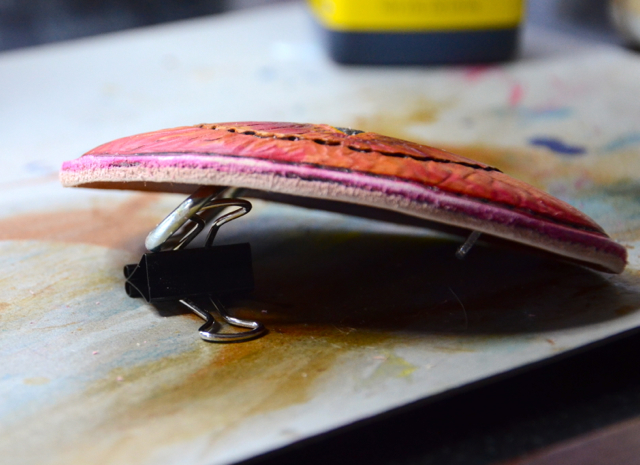
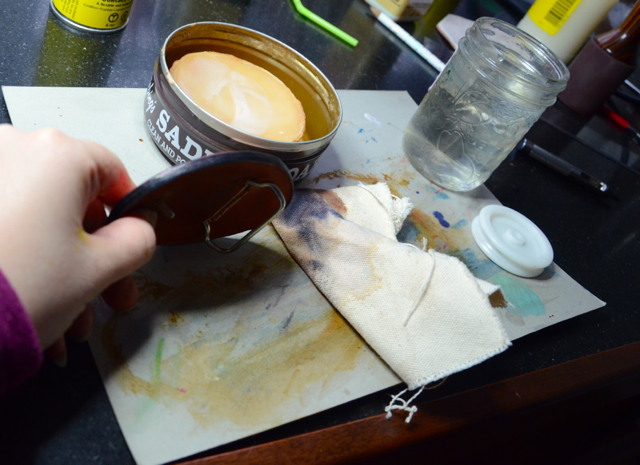
After a few hours, you can remove the clips. Sand the edges so that they are flush, and then dye them. I chose to dye the edges black. Use your preferred burnishing method to smooth the edges. I chose to rub it with saddlesoap-imbibed canvas cloth. Some of the dye came off on the canvas cloth. That’s ok, a sealing finish will be put on the leather before it will be worn.
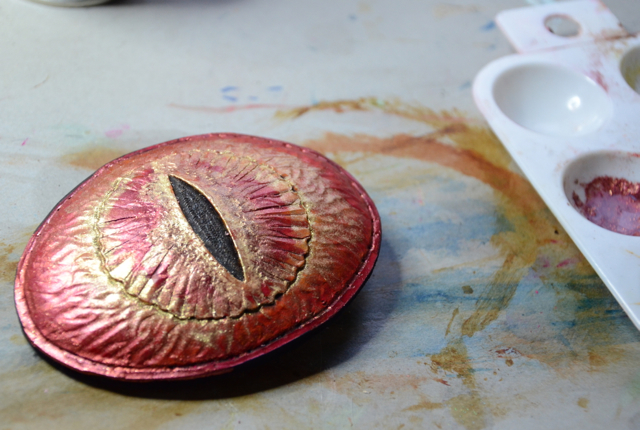
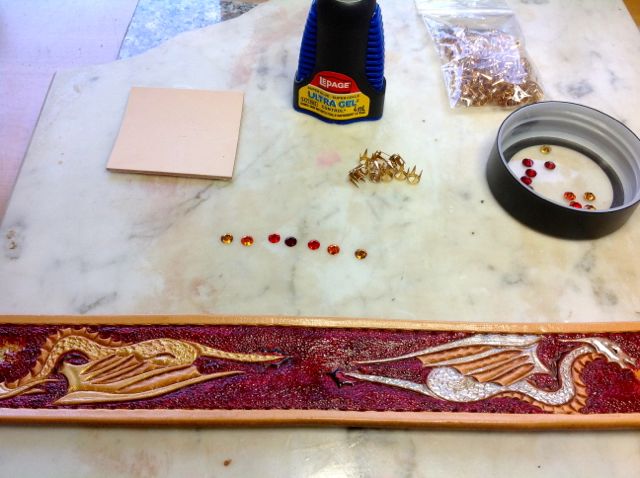
To bring a bit of drama to the carving, I used Pearl Ex metallic powder pigments mixed in leather finish to highlight the carving. It’s a bit on the shiny side now, but I expect some of the pigment to wear off over time as the belt is worn. A layer of leather finish is brushed on the front and the back of the buckle.
Time for assembly! I’m assuming you know how to sew leather. If not, this book will explain how, in great detail. I use a stitching pony to hold the buckle to free both of my hands.
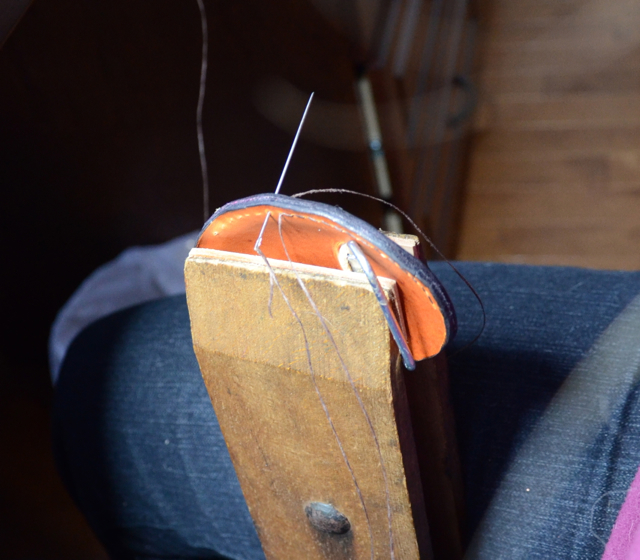
All that’s left is to hand-sew the buckle to the belt strap… and voila!
[…] « How to Make a Leather Belt Buckle […]
[…] “old” leather seemed to have aged to nothing. The only picture I have of it is from my How to Make a Leather Belt Buckle blog post a while […]
Very cool buckle you inspired me to make a buckle of my own. Came out good for my first.
Absolutely AWESOME!